This means that you have to turn on features now instead of disabling
them like auth and https.

In addition:
- Allow multiple options for auth (only password for now).
- Combine the install docs since they had many commonalities and
- generally simplified them (hopefully not too much).
- Move all example configs into docs/examples.
3.1 KiB
Installing code-server in your ChromiumOS/ChromeOS/CloudReady machine
This guide will show you how to install code-server into your CrOS machine.
Using Crostini
One of the easier ways to run code-server is via Crostini, the Linux apps support feature in CrOS. Make sure you have enough RAM, HDD space and your CPU has VT-x/ AMD-V support. If your chromebook has this, then you are qualified to use Crostini.
If you are running R69, you might want to enable this on Chrome Flags. If you run R72, however, this is already enabled for you.
After checking your prerequisites, follow the steps in the self-host install guide
on installing code-server. Once done, make sure code-server works by running
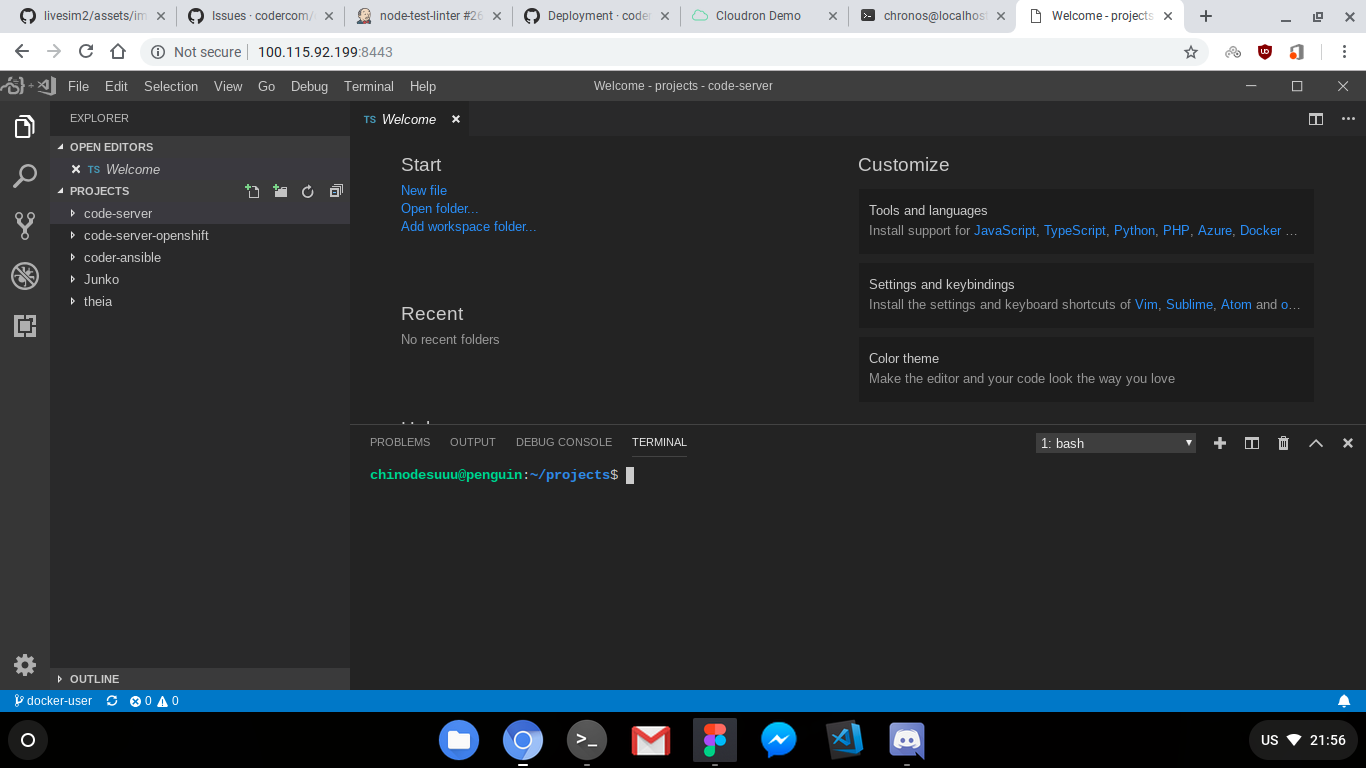
it. After running it, simply go to penguin.linux.test:8443 to access
code-server. Now you should be greeted with this screen. If you did,
congratulations, you have installed code-server in your Chromebook!
Alternatively, if you ran code-server in another container and you need the IP
for that specific container, simply go to Termina's shell via crosh and type
vsh termina.
Loading extra module: /usr/share/crosh/dev.d/50-crosh.sh
Welcome to crosh, the Chrome OS developer shell.

If you got here by mistake, don't panic!  Just close this tab and carry on.

Type 'help' for a list of commands.

If you want to customize the look/behavior, you can use the options page.
Load it by using the Ctrl+Shift+P keyboard shortcut.

crosh> vsh termina
(termina) chronos@localhost ~ $
While in termina, run lxc list. It should output the list of running containers.
(termina) chronos@localhost ~ $ lxc list
+---------|---------|-----------------------|------|------------|-----------+
|  NAME   |  STATE  |         IPV4          | IPV6 |    TYPE    | SNAPSHOTS |
+---------|---------|-----------------------|------|------------|-----------+
| penguin | RUNNING | 100.115.92.199 (eth0) |      | PERSISTENT | 0         |
+---------|---------|-----------------------|------|------------|-----------+
(termina) chronos@localhost ~ $
For this example, we show the default penguin container, which is exposed on
eth0 at 100.115.92.199. Simply enter the IP of the container where the
code-server runs to Chrome.
Using Crouton
Crouton is one of the old ways to get a
running full Linux via chroot on a Chromebook. To use crouton, enable
developer mode and go to crosh. This time, run shell, which should drop you
to bash.
Make sure you downloaded crouton, if so, go ahead and run it under
~/Downloads. After installing your chroot container via crouton, go ahead and
enter enter-chroot to enter your container.
Follow the instructions set in the self-host install guide to
install code-server. After that is done, run code-server and verify it works
by going to localhost:8443.
At this point in writing,
localhostseems to work in this method. However, the author is not sure if it applies still to newer Chromebooks.
